Order
Now
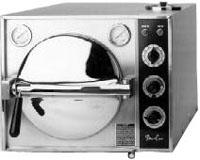
Here is what is being done to this sterilizer before it is being
shipped to you:
 Replace all three heaters
Replace filter
Install New Gasket
Rewire the entire sterilizer with temperature sensitive wire
Upgrade to a larger reservoir
Install New Temperature and Pressure Gauges
Calibrate for more accurate temperature & pressure reading
Install 'Over Pressure' Safety Valve
Upgrade to our Automatic Shut Off System
Upgrade to our Automatic Venting
System
Upgrade and strengthen the
chamber.
Warranty:
One year warranty for parts and labor. (except door
gasket, filter & freight)
Testimonials
Availability
of other Sterilizers
P.S. Here are the instructions on how
to run this sterilizer. Unbelievably simple..
OCM / OCR Operation Manual
1. Place unit on a leveled surface. This will
allow the chamber to fill with the right amount of water.
2. Fill reservoir 2 inches from top with distilled water.
3. Plug sterilizer into grounded outlet.
4. Put instruments on tray and into chamber.
5. While door open, turn bottom switch to 'fill' position,
and leave at that position for about 50 seconds, until water
reaches the front rim of the chamber. Please be sure timer
is set on zero. *Note: Unit will not fill if timer is not
on the off position*.
6. Close door.
7. Make sure the middle knob is turned all the way clockwise.
This will ensure 270f.
By turning the middle knob counterclockwise...you will be
reducing the temperature.
8. Turn timer to 15 minutes + appropriate time (look at table
below). *Note: Timer will buzz for 20 seconds when turned
on.*
9. Turn the bottom switch to 'sterilize' position.
10. Both red & orange light will come on.
11. At end of cycle, the timer and both orange & red lights
will be turned off and the pressure will be vented automatically.
12. When pressure gauge shows 'zero', you may open the door.
13. If you want the instruments to be dryer than they are...leave
the door slightly open, and turn the bottom switch to vent
position and set the timer to 10-15 minutes.
* Important notice - Please do not attempt to adjust the
front legs. They have been intentionally set this way*.
General Guidelines*
Unwrapped instruments..........121c 250f 15psi 15min
132c 270f 30psi 3min
Lightly wrapped.......................121c 250f 15psi 20min
132c 270f 30psi 9min
Heavily wrapped...................... 121c 250f 15psi 25min
132c 270f 30psi 11min